Concepts explained:
- Shell
- Types of shell
- Terminal
- iTerm2
- zsh
- oh-my-zsh
- How to install
- Screenshots of commands for installation
Communication between a human being and a machine of any sort is complex yet interesting (in this case a computer). Simply because the two parties involved do not belong to the same specie or type, if you will.
To make this happen, we need an enabler. And a shell is exactly that. It is an enabler enabling seamless communication between you and your computer. This includes all the commands we give to our computer, which are then understood and executed.
Now, let us look at the types of shell. Broadly and relevantly speaking, there are two: Graphical User Interface (GUI) and Command Line Interface (CLI). The meaning lies pretty much in their names. The former is a visual way of interacting with a computer using visual metaphors, icons, symbols and pointing devices. For instance, let’s consider watching a YouTube video. The successful completion of this task will involve interaction with multiple GUIs like the OS, the browser and the web application. In short, you don’t need to be a software developer or a techie to navigate around and the visual cue makes it super simple. But if your memory game is as extraordinary as that of a dolphin, multitasking is the need of the hour and you are well versed in commanding the OS via text inputs then CLI is your pal.
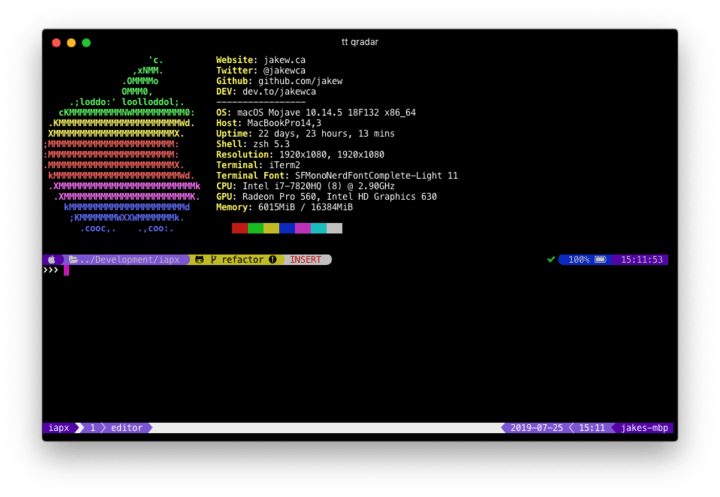
The Mac Terminal is a default command line system program that comes installed on your Mac empowering you to take control of your OS and make the desired changes using a command prompt. But you know what they say, that things get better with time!
What is iTerm2 and why is it better than the terminal?
iTerm2 is a replacement for the Terminal and a successor to iTerm. It works on Macs with macOS 10.14 or newer. It reeks of modernization and absolute delight with every possible feature that a user could and would not have asked for! Multiple text selection methods, option to split a tab into “panes” where in each of them act like a different terminal session, Hotkey window, option to create “check points” so that if an error is made you can jump back to the location to fix the same, high color mode supporting 256 color mode, password manager to save your passwords, tab bar positioning to the left side of the window and the list goes on! Let us look at a few of the above features in pictorial form.
Split Panes (the inactive pane to the left in the above picture is evidently dimmed so it is easier to see the one that’s active)
Hotkey window
24-bit and 256 color mode
Global search option across all tabs at once
Elaborating on the topic of shell, if terminal were to be pictured as a device that will allow us to control it, Shell is the language we will employ to effectively communicate our instructions and ensure that they are followed. As an extended version of the Bourne Shell, Z Shell or ZSH has a plethora of new features, themes and support for plugins. It is a hassle free commute from the good old Bash to the beautiful new ZSH as the latter is based on the same shell and many underlying features coincide. Let us look at some major improvements:
- Automatic directory change (cd) by just typing the name of required directory.
- Multitude of plugin frameworks and theme support.
- Smart spell check for minor mistakes
Oh My ZSH is a community driven framework to manage your ZSH configurations, plugins and themes. Would you ever think of a burger without fries and a cold drink? No, right? I mean, we all agree that they taste much better together. Just like that, the combined set up of ZSH plus Oh My Zsh plus iTerm2 is a real winner. Only ecstasy and no misery!
Now let us look at the installation steps for iTerm2, ZSH and Oh My ZSH.
- Go to the download page using the following link https://iterm2.com/downloads.html
Once you click on the above link, what you will see will look exactly like the picture below. Download a stable release.
- Then you will be prompted to download a .zip file. Then extract the zip file and move the iTerm2 application to your system application folder like so.
- Now it’s time to install zsh. In most cases, the Mac OS is already preloaded with zsh. Locate your shell.
echo $SHELL
/bin/zsh
- Find your version.
zsh –version
zsh 5.8 (x86_64-apple-darwin20.0)
- If you don’t have it then you can install it using Homebrew. Follow the steps below to install Homebrew.
/bin/bash -c “$(curl -fsSL https://raw.githubusercontent.com/Homebrew/install/master/install.sh)”
Homebrew requires Command Line Tools for Xcode. You should be seeing the following next.
Using the text editor (Vim/VSCode/TextEdit) add the following:
# ~/.zshrc
export PATH=$(brew –prefix)/bin:$PATH
Followed by the source
$ . ~/.zshrc
This will then load the following:
~/.zshrc
Now run brew help to see if it is installed.
- After installing Homebrew for the required version of zsh (if you did not have it already), follow the next step:
$ brew install zsh
- Finally, just copy and paste the following command into your terminal and hit enter.
Using curl:
$ sh -c “$(curl -fsSL https://raw.github.com/ohmyzsh/ohmyzsh/master/tools/install.sh)”
Using wget:
sh -c “$(wget https://raw.github.com/ohmyzsh/ohmyzsh/master/tools/install.sh -O -)”
If you use curl command, the output will look as follows:


